Guides: Layout
This is an example of how I prepare for and lay out a normal 5 decade rosary, focusing on testing and choosing beads and laying out the beads so you do not notice small size differences between individual beads and to make it easier to align the rosary once it is finished.
This guide describes my process of preparing and laying out a rosary. I use a few extra steps at the beginning to make the construction process faster, easier, and more efficient. It also lets you split up the work into a “prep phase” and a “build phase”. Building the entire piece in one sitting helps you keep your loop sizes consistent and makes perfect alignment easier to achieve. Splitting things up by preparing everything beforehand also makes it easier to manage your time.
Step 1 - Gathering everything you’ll need.
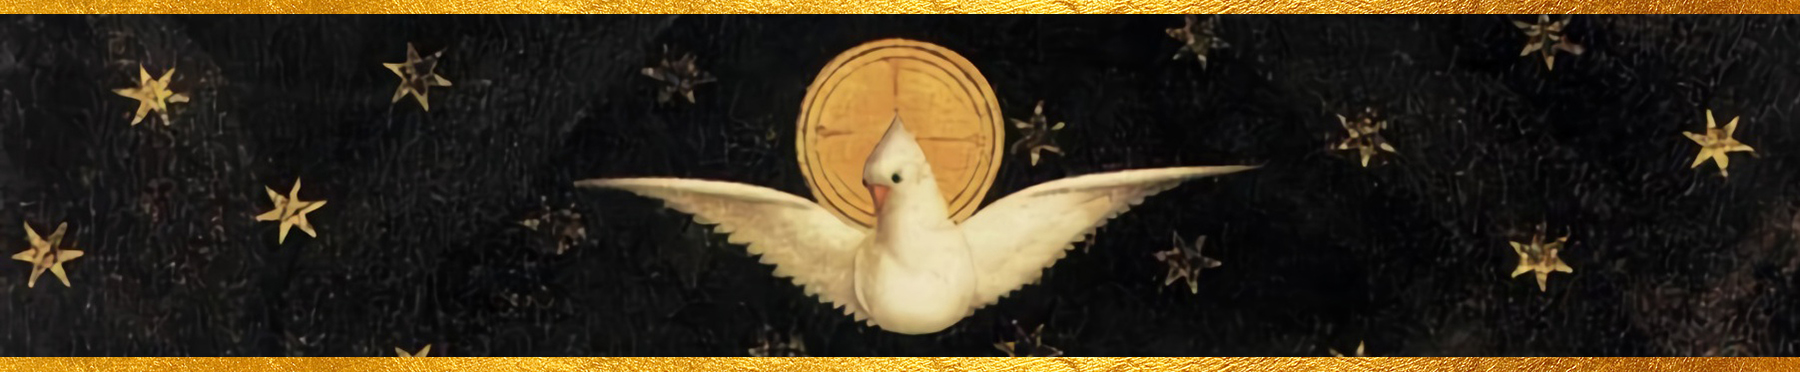
I start off by gathering everything I'll need for the rosary. Make sure you have all the beads you'll use, the wire and rings you need, bead caps if you are using them, chain, the crucifix & center, and of course a bead board and your tools.
I’ve found the most efficient way to start is to prepare the materials before I need them. Close all the rings you need for a rosary (106 + a few in case you drop one) and make your eye pins (53 + few in case you mess a couple up), as described in our simple loops guide. For Silver rosaries, I like to clean my rings after closing them using TarnX silver cleaner, and I clean the wire before making the eye pins using Wrights silver polish by applying it to a paper towel and pulling the wire through. This is the easiest time to clean your silver. If you plan on waiting a while before starting construction, put your pins and rings in small ziplock bags so they don't tarnish.
By getting all the materials ready beforehand, you won’t need to change your focus or your muscle memory while you’re in the middle of construction, and you can be sure that you have enough materials to finish a whole piece.
Step 2 - Testing the beads
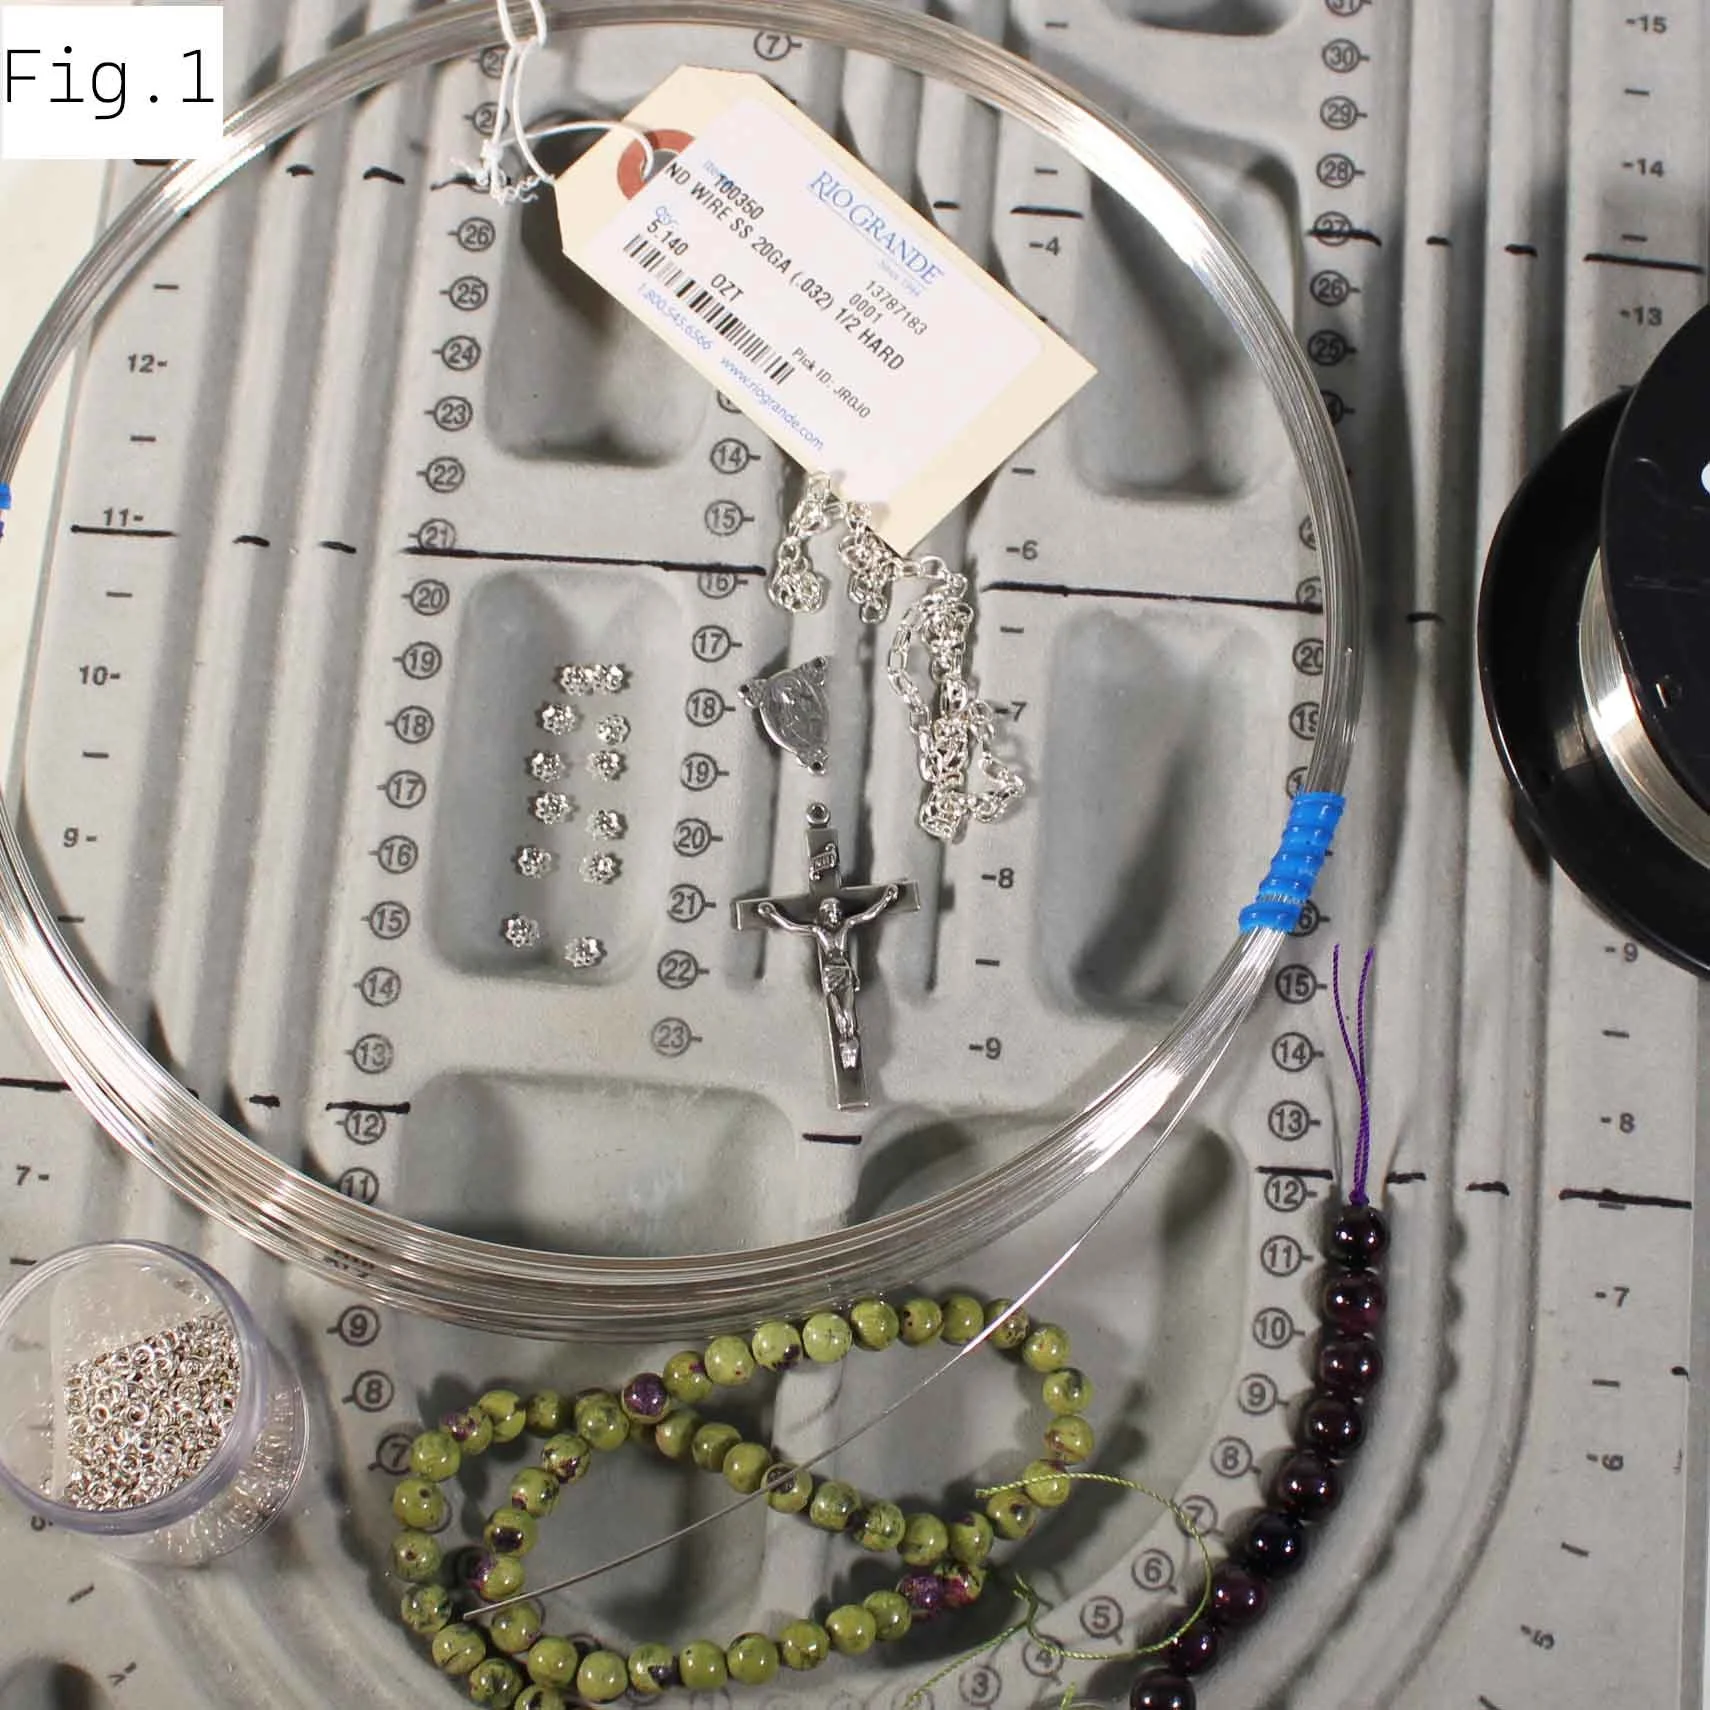
Now I start actually laying the rosary out. First up is testing the beads, I use a piece of wire the same gauge as I'll use for construction (I'm using 20 gauge wire with 7mm beads here) with a small piece of tape stuck to it to hold onto. Write the gauge of the wire on the tape, and you have a simple and effective way to make sure your beads have good drills and aren't damaged, cracked, or off round. Put the beads on in small groups (5-8) and spin them around on the wire so you can inspect them. Spinning them a little makes it immediately obvious if a bead has an off center drill, which is the most common problem you want to avoid.
As you can see in Fig. 2, the first bead on the left has an off center drill and hangs a little lower than the others. This will make it harder to make a loop later on, and can look weird or “wrong” once its chained together with the others. Also check for cracks, chips, or noticeably off-round beads. The more beads you have available, the more picky and choosy you can be, but if you're short on beads you might just have to settle for a non-perfect bead or two.
Step 3 - Matching decades pt.1
As you test your beads, start putting them down on your board in groups of 10 to make your decades. This is a good chance to start arranging your beads by color or appearance. The stones in these photos are all more or less consistent in terms of color, but if you are using beads with a wider range of colors and light/dark beads, you'll want to put some different colors around depending on how you'd like the final piece to look.
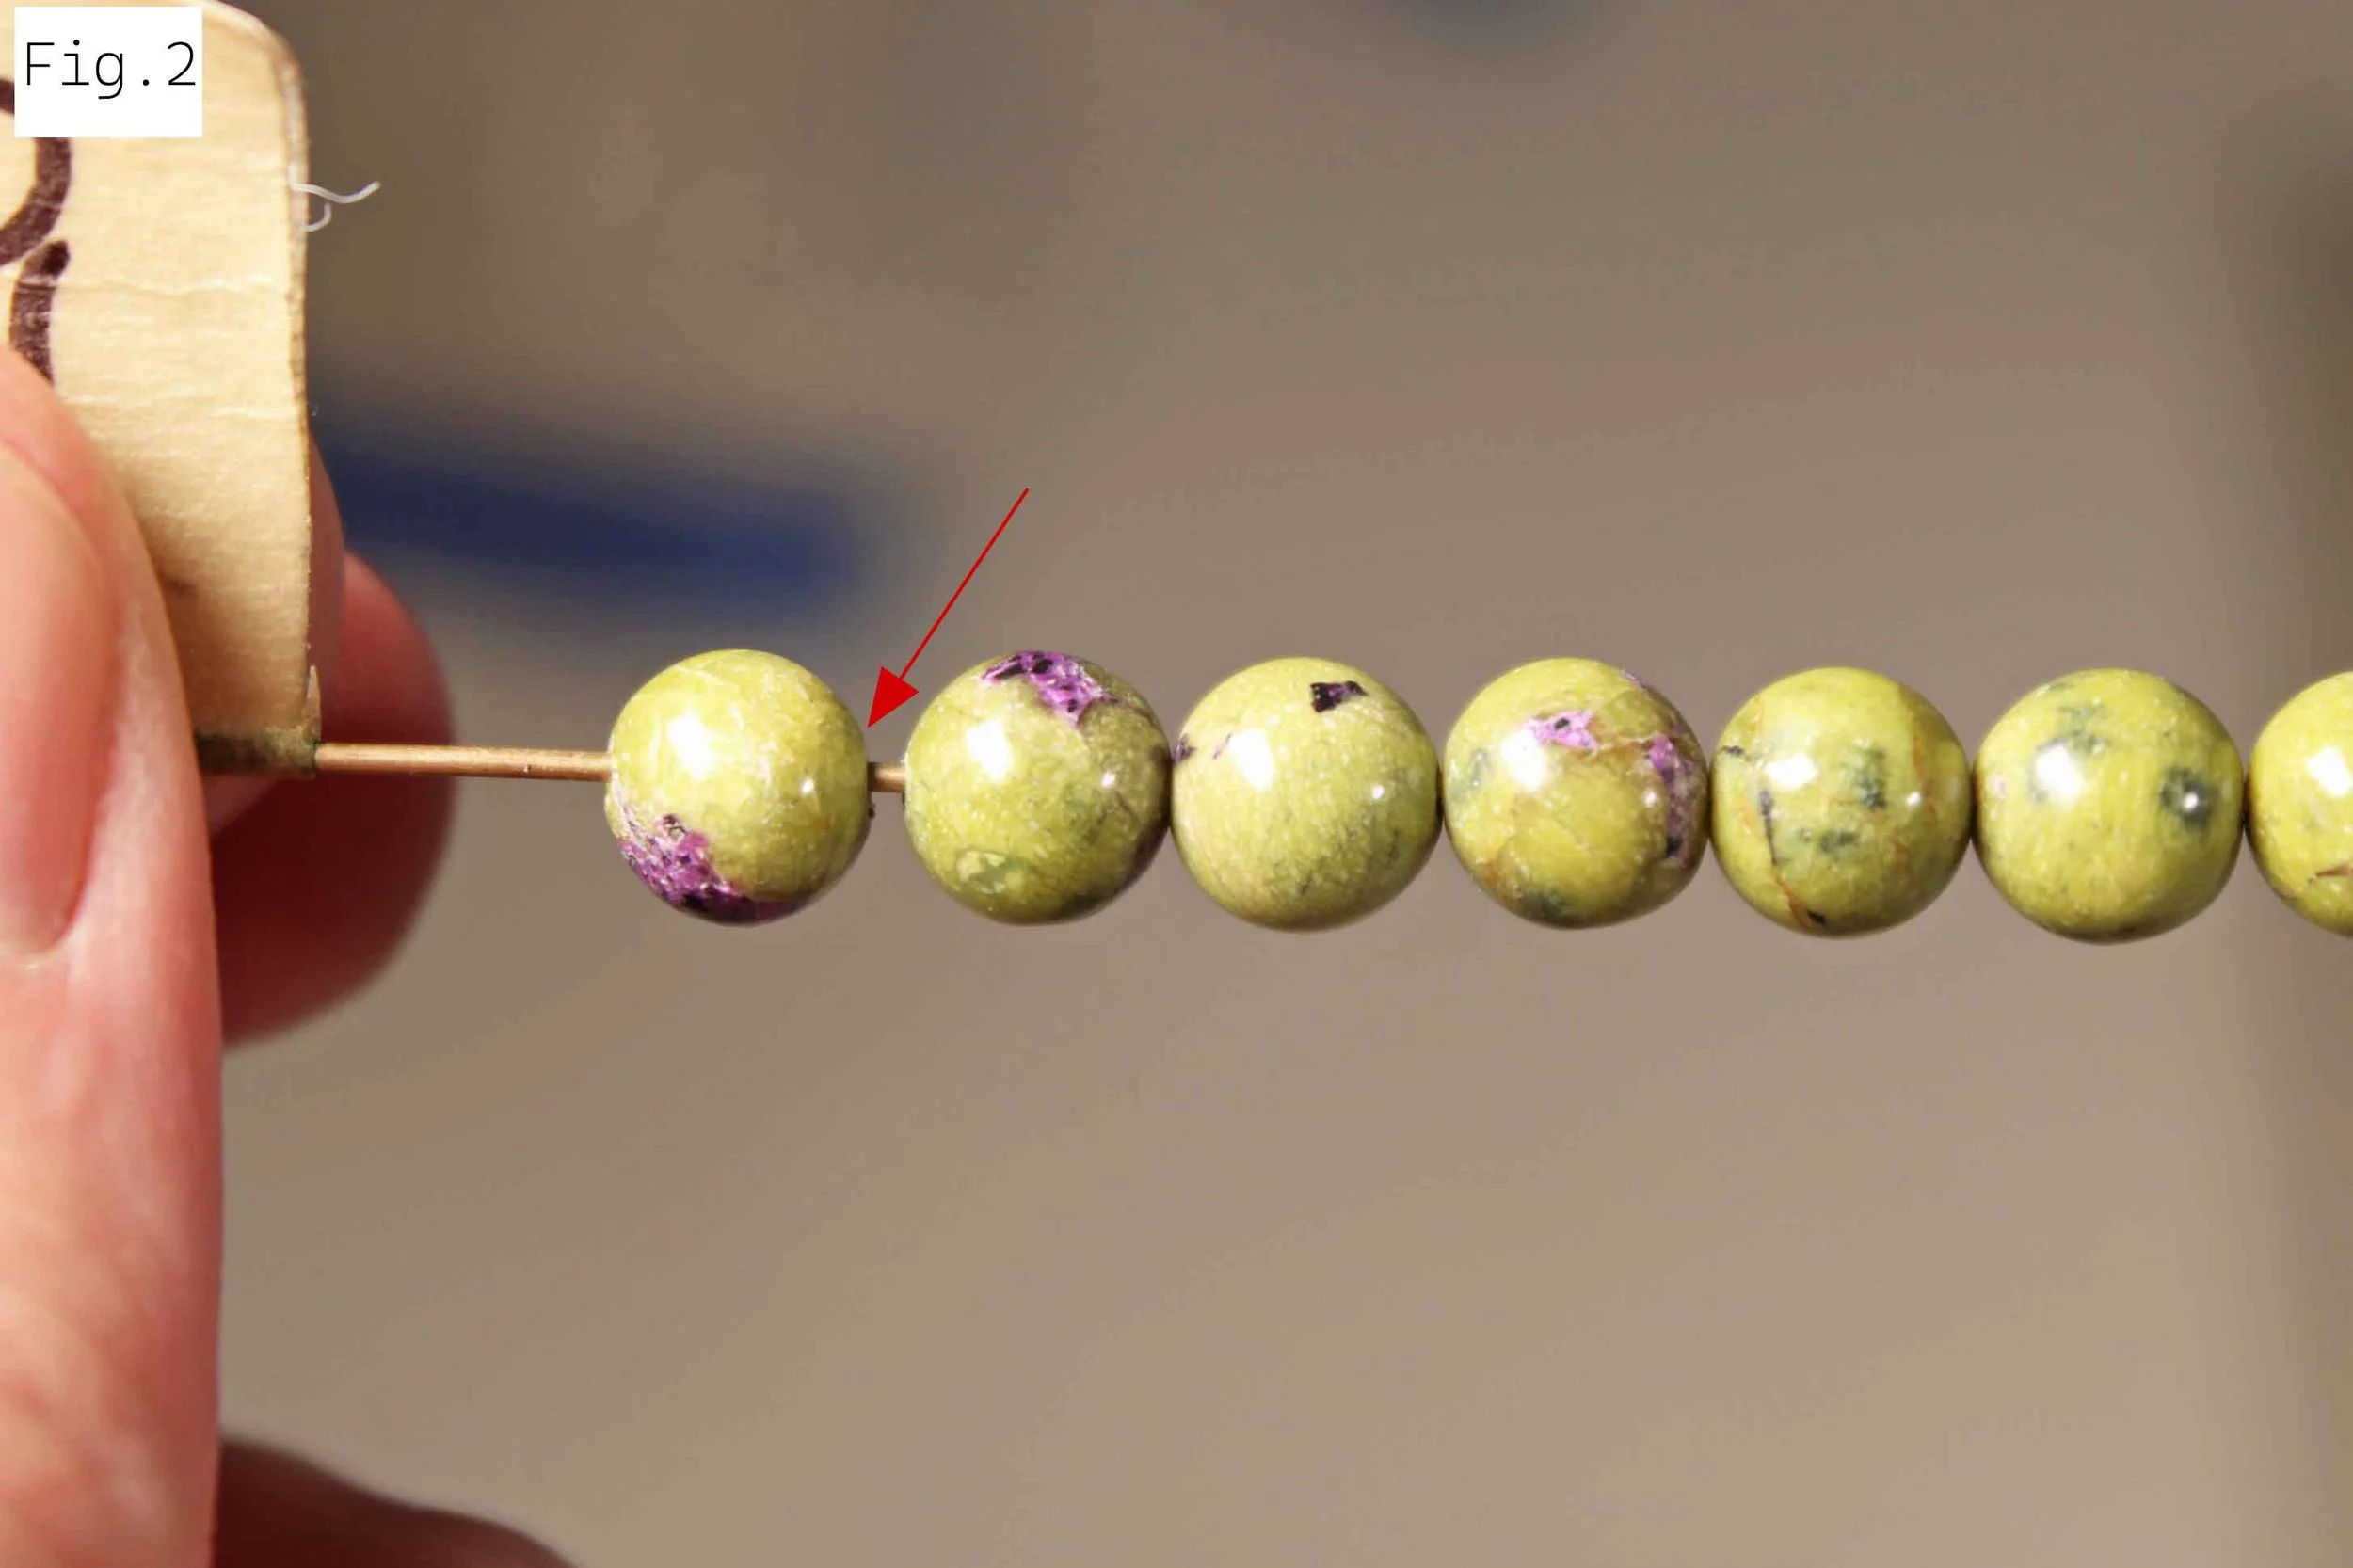
Once you test all 53 beads, line up 3 decades beside each-other, and two next to one another further up the board. I measured and added some parallel lines to my board in black marker to make this and the next step easier, but you don't need to. Use a ruler on one side of the beads as a makeshift wall to line the decades up so you can see their lengths. Use some reference points on your board to make sure the ruler is 90 degrees perpendicular to the beads so you don’t throw off the decade lengths.

Step 4 - Matching decades pt. 2
Bend down so you can see the differences in length easier. Note in Fig. 4 that two decades are the same length, but one is shorter. Start plucking and moving beads between the decades to try and get them the same length. Depending on the stones you are using, getting them exactly the same might be impossible, but getting them as close as you can will helps a lot. Roll the beads apart and back together against the ruler to account for off-round beads. Once two of the three (or all three, with a little luck) decades are the same length, move the one that does not match down to line up next to the other two decades and repeat. Ideally you'll end up with all five decades being roughly the same length, but as long as you have two pairs that match that is fine.
With the decades as equal as you can make them, push them around the board to sit opposite of their paired decade, as shown in Fig. 9 further down this page. From here on, you want to keep the beads of each decade together, so be careful moving your board around so you don’t jostle them or mix them up.
Step 5 - Dealing with bead sizes pt. 1
Next, you need to make the decades as even as you can. As you can see in fig. 5, there are larger and smaller beads mixed throughout the decade. Change the order of these beads so that the larger ones are in the middle of the decade, and the smaller ones towards the ends. This is an easy way to hide beads being different sizes inside of your decades.

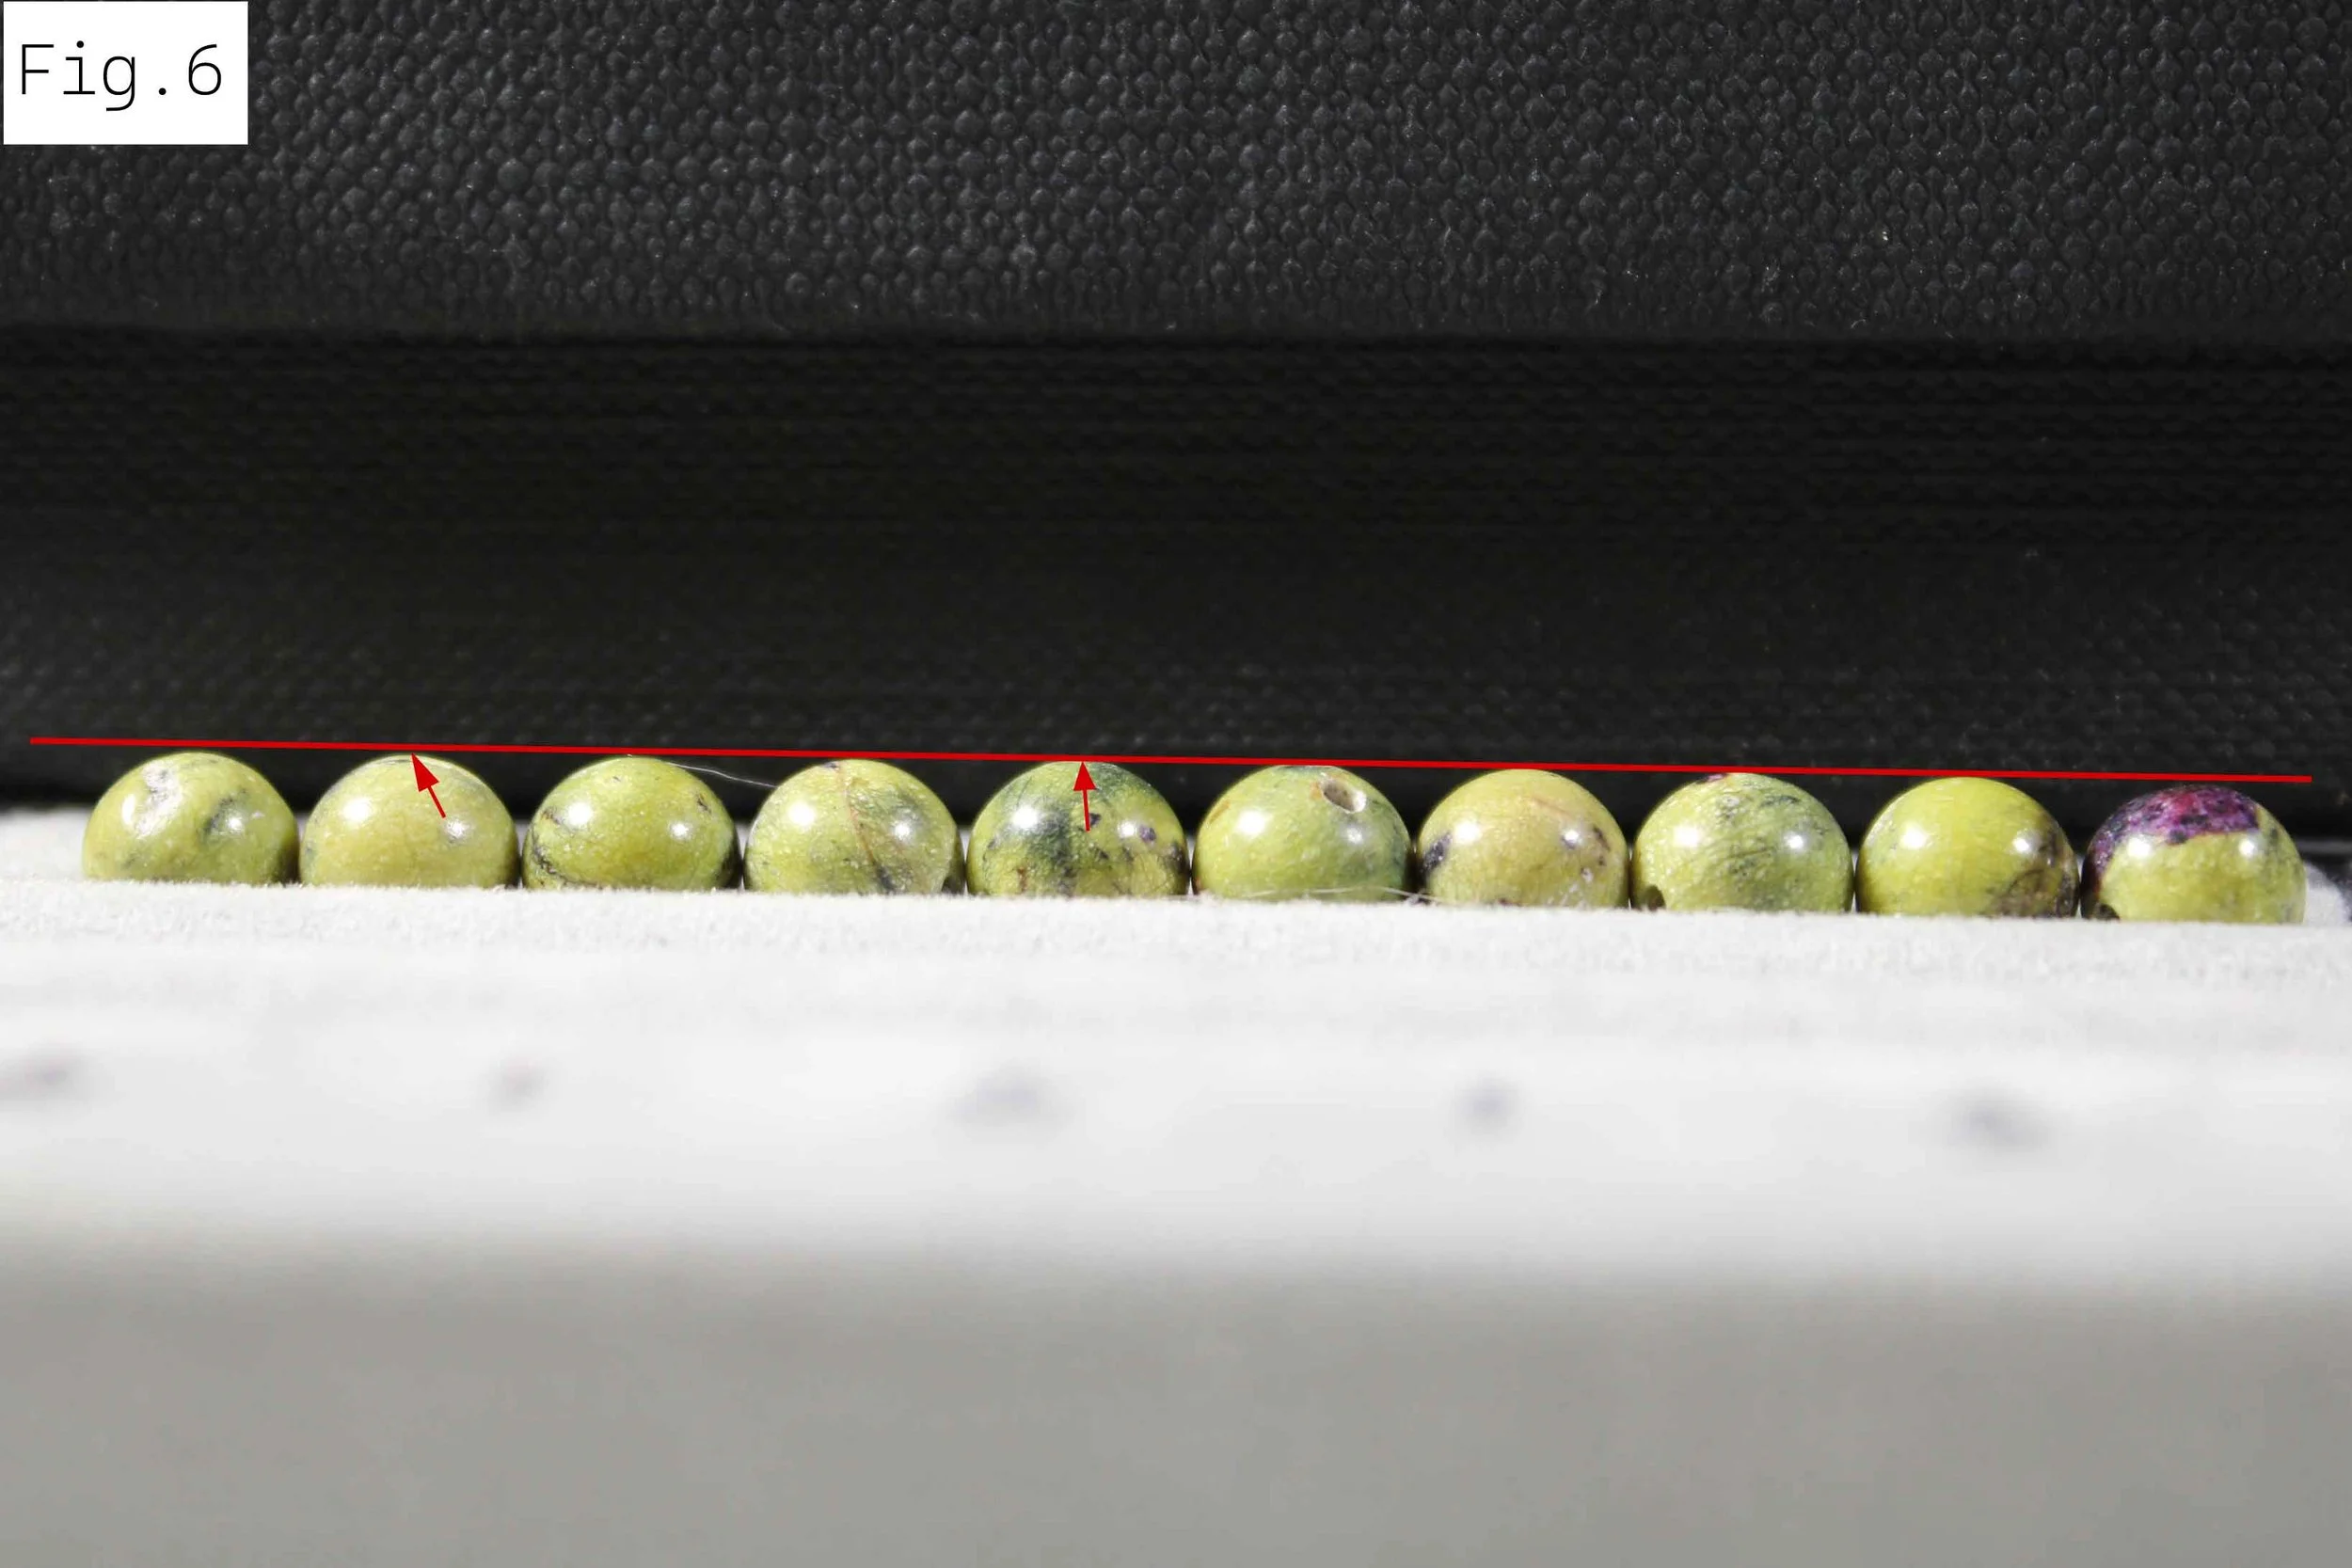
Step 6 - Dealing with bead sizes pt. 2
In fig. 6, you can see that the larger beads are towards the middle of the decade, and the smaller ones towards the edge. You almost can't tell that there are different sizes of beads here, and it really helps clean up the rosary and make it look much more professionally made.
There are times where you can disregard this step to some degree, such as when making rosaries with a gradient, but try to follow this pattern as much as possible.
Step 7 - Testing Pater beads
Now you start picking your Pater beads. Repeat the same testing process, putting the beads on your tester and spinning them slowly to check them over. As you can see in Fig. 7, while all the beads have nice centered drills, the bead on the far left (red arrow) is quite out of round compared to the beads in the middle (green arrow). Its a small difference, but it can make a large impact in the finished piece, and constructing with off round beads is much harder to get perfect.
If your Pater beads have larger drills, they might make you think the bead has a bad drill when really it is fine. Bead caps will eliminate some of this issue, and make your wraps tighter and more neat.

Step 8 - Picking pater beads
Pick out three pairs of beads that are as close to the same size as you can, and look nice as a match. If you can't quite get three pairs that are the same, the pair that goes in the drop can be different sizes without affecting very much. The other two pairs do need to be the same size, though, as them being different sizes will throw off your alignment.
Consider the color of the Pater beads when choosing pairs. You don’t normally want to match a bright bead with a darker one, or a heavily patterned bead with a more plain one, as it can throw off the balance of your rosary.

Step 9 -
With all your beads tested and arranged, and you wire & rings prepared, you have a nicely laid out rosary ready and waiting for you. Now you can start construction as you please, and won't have to break your stride to prepare more rings or wire in the middle of a decade. Knowing for certain that you don't have any bad beads waiting for you makes the looping a lot faster and easier.
If you make a lot of rosaries, you may find your back and shoulders suffering. Being able to break things up into chunks will let you give your body a rest without throwing off your “groove”. You can also choose to pre-close a bunch of rings all at once or prepare eye pins for several rosaries.
